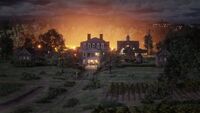
- Sean: "I'm rebel stock, boy... I was born burning down manor houses."
- Arthur: "Well, burn quietly."
- ―Sean MacGuire and Arthur Morgan
The Fine Joys of Tobacco is a mission in Red Dead Redemption 2.
Mission Overview[]
Working with the Braithwaites, Arthur and Sean drive to Caliga Hall with the remaining moonshine and attempt to use it to burn the Grays' tobacco fields.
Story[]
Arthur arrives at Braithwaite Manor and tells the guards he has business with Catherine Braithwaite, so the guards let him in. Arthur enters the manor and the butler takes him into the living room where Catherine, Hosea and Sean are playing Cribbage. Bartholomew, one of the sons is also there. Catherine asks if Arthur is as "dumb as he looks", but Hosea assures her he will get the job done if the payment is right. Bartholomew responds to this with an insult before Sean and Arthur leave and head outside to a wagon loaded with moonshine, with Arthur bluntly denying Sean's request to drive.
As they set off, Arthur comments on how silent Sean was earlier. Sean says that it wasn't easy and expresses his dislike for Bartholomew and Catherine, which makes Arthur laugh. He then explains that they are going to burn down the Grays' tobacco fields with the highly flammable moonshine in the wagon. He says that they will pretend to be just another delivery wagon when entering the Grays' property to avoid suspicions.
As they approach Caliga Hall, Sean suddenly realises that the Grays will recognise Arthur as he has been working for them. Arthur gives Sean the reins and hides in the back of the wagon so the guards won't see him. Sean drives up to the property and is greeted by a guard named Hamish. He tells Hamish that he is just a new delivery boy, so the guard climbs aboard the wagon with Sean to direct him to the warehouse and they have a friendly chat. Once in the warehouse, Sean distracts Hamish by talking with him so Arthur can kill him from behind. Once Hamish is dead, they shut the doors and wait for nightfall.
Once it's dark, Sean and Arthur prepare the fire bottles to use on the fields. As they sneak outside, they hear another wagon arriving and hide. They realise that it's a supply wagon carrying payroll, which could be a good bonus. As Sean makes his way to the barn, Arthur begins working on the fields. He slowly pours moonshine into each one while hiding in the crops to avoid the patrolling guards. Arthur then meets up with Sean at the barn. Sean gives the barn a quick dousing before Arthur tosses a fire bottle into it, setting it ablaze.
The two then throw more bottles into the fields to burn them down. This alerts the guards, who open fire on the duo. During the firefight, Sean spots two horses to escape on, but the horses get scared by the gunfire and bolt off, so Arthur and Sean shoot their way through the burning fields (with Sean clearly enjoying it) towards the supply wagon they saw before to take its horses instead. Upon reaching it, Arthur untethers the horses while Sean searches the wagon for the payroll. He soon finds it and the pair ride off, killing more guards before finally escaping.
Once they are safe, Arthur and Sean comment on the night's events. The player can then choose to head back to camp with Sean or stay behind.
Gold Medal Objectives[]
- Silently kill the Gray Sean distracts in the wagon store.
- Douse the fields within 2 minutes 20 seconds.
- Kill 5 Grays during the escape.
- Complete the mission without taking any health items.
Tips[]
- If you are attempting to get the Gold Rush trophy/achievement, consider not using this mission for that goal. It is very manageable to get a silver medal for most of the objectives but trying to kill the last 5 Gray guards by yourself can be very tricky. While entirely possible to get a gold medal with many, many attempts:
- It takes a decent amount of time to ride from camp to get to Caliga Hall even before you can start the objectives. Not using health items means you can't restart a checkpoint at any point during the mission if anything goes wrong. Any mistake or missed objective forces you to start the mission over by returning to camp and doing the entire ride again.
- Trying to cover the fields with moonshine quickly and not getting caught makes it very tight for the time requirement. It is recommended that the player waits for the wagon to pass by before immediately running to the end of the fence where the wagon came from and then entering through an opening to start dousing before the prompt to do so appears.
- When riding with Sean through the burning fields, any mistake or slight deviation from the path and you/your horse set on fire and you die.
- There are exactly 5 Gray guards that can be killed to meet the requirement. Sean has very accurate aim and instant kills the guards almost before you can see them. It is dark, the horses are crossing in front of each other, and the burning fields' billowing smoke obscures your view. A single Gray guard kill from Sean and the objective fails.
- It is possible to try and get a head start on Sean at the end by getting onto your horse and riding away without him. Be warned that if you go too far ahead, you will abandon Sean and the mission will fail. However, it does open a small edge for you to be closer to kill the Gray guards by carefully practicing the escape route.
Deaths[]
- Hamish - Killed by either Arthur Morgan or Sean MacGuire.
- Gray family gunmen - Killed by Arthur Morgan and Sean MacGuire.
Mission Failure[]
The mission will fail if the player:
- Assaults, kills or abandons Sean;
- Allows Sean to be killed;
- Attacks anyone or uses their weapons at Braithwaite Manor;
- Destroys or disables the moonshine wagon;
- Alerts the Gray guards before the firefight;
- Runs out of Moonshine while dousing the fields;
- Kills an escape horse;
- Dies.
Trivia[]
- Before the mission, Arthur can steal the moonshine wagon, deliver it to the Wagon Fence and sell it to Seamus.
- It is possible to explore the Braithwaite house before starting the mission. The player has to throw a dynamite or any projectile at the doorman after the latter opens the door and asks Arthur to come inside the house.[1]
- The Braithwaite house can also be explored during the mission after the initial cutscene.
- If the player uses mods and goes back to the room where Hosea, Catherine and Bartholomew are, Hosea will tell Arthur to get back on the horse despite the objective being to get on the wagon.
- During this mission, Arthur mentions that the fire will spread quickly as the area has not had any rain in the last few months. Accordingly, it is not possible for the player to observe any rain within the entire Scarlett Meadows region until after this mission is completed.
- If the player kills Hamish the guard before Sean does, Hamish's body will still be lying just outside with a stab wound in the following cutscene as if Sean had killed him instead.
- It is impossible to loot Hamish due to the cutscene starting only moments after killing him.


